Hat on Top, Coat Below
« previous archives home notify list e-mail next »
Modern Quilt-Along Progress Report
August 8, 2005
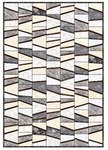
Over the weekend, I finished my first set of blocks:

They went together pretty quickly, so I did a second set and mixed those in:

Things I learned when making the blocks:
1) One of the dark green fabrics I picked is actually grey. My excuse is that I pulled it from some strip scraps, so I didn’t have a whole piece of yardage staring me in the face. I’ve decided to leave it in the mix; it’s the right value and doesn’t stand out next to the greens and greys of the other branches, nor does it blend into any of the greys I’m planning to use for the snow/sky pieces.
2) It is very helpful to mark the chalk line on the snow/sky rectangles before cutting them, just like the book says. This makes it very easy to keep the pieces in the right orientation when you set them down on the branch strips and feed them under the presser foot. It is possible to chalk the pieces after they’re cut, but it’s much easier to do it before.
3) When joining the snow/branch units to each other, check the alignment before you sew to prevent incidents like this:

These aren’t the regular angles I’m used to working with. Because it’s improvisational cutting, the angles aren’t even consistent block to block. Why I didn’t think about that when I picked the pattern, I do not know. I think I’m up for the challenge, though. If it gets too tedious, I can always cut the rectangles bigger than I need and trim the finished blocks down–that would give me more room for error.
4) My suspicion that pressing the seams open (as the book recommends) would mess with my head was correct. I know it helps the blocks stay flatter–I saw that in the center blocks Mel did for the gift quilt–but it’s really bothering me to see those seam allowances showing through behind the white fabrics. I’m hoping they won’t be so obvious once the quilting is added. (I predict the quilting might bring more difficulty, as I usually start with stitching in the ditch to stabilize a piece before adding decorative quilting, but when the seams are pressed open, there’s no ditch in which to stitch.)
Instead of setting the blocks straight, I’m considering dropping every other column down a half a block. This is a modern quilt, after all; why should it follow the straight block set convention established in so many antique quilts? (Also, why should I have to match all those intersections where four blocks come together?) I took one of the images from EQ and manipulated it with Paint to see what that might look like:

I guess there’s no reason it would have to be the same offset for each column, either. I’ll have to play with that idea some more after I have enough blocks done to get a good feel for what it will really look like. I might need those horizontal seams to provide a framework to contain the chaotic angles in the blocks.
Mr. Karen was gone most of the weekend on a kayaking trip. When we were catching up on Sunday, I told him my working title for the quilt I’d started while he was gone was “My Husband Doesn’t Like It” because it doesn’t use anything he considers a real color. He went and took a look at the felt wall (one wall of the dining room wall has had white felt pinned to it approximately 98% of the entire time we’ve lived in our house) and said something like “well, red–that’s a color”; he was looking at the baby quilt in progress and hadn’t even noticed the Treehouse blocks. Hah. Once he looked at them, he did say the angles and shapes were interesting, so I guess I need a new working title. “Open Seams-a-me”, maybe.
